

 Try for Free
 Try for Free
Last updated on 2026-03-30, by
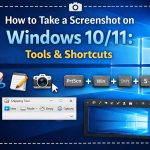
How to Screenshot on Windows 10/11: Tools & Shortcuts
Summary:
You can use native shortcuts, Snipping Tool, Xbox Game Bar, and third-party tools to take screenshots on Windows 10/11. Read the full article to learn more.
MenuCLOSE
Screenshot is an important skill to share information, save digital receipts, and create technical guides. If you don’t know how to screenshot on Windows 10/11, this article is exactly what you need. I will offer detailed guides from basic shortcuts to third-party tools you may need.
Windows Screenshot Shortcuts [Quick Method]
Windows has a built-in screenshot feature that requires you to press the PrintScreen (PrtSc or PrtScn) button. Here are 4 shortcuts to know for screenshotting with PrtSc.
|
PrtSc |
Captures the whole scree. |
|
Alt + PrtSc |
Capture the active window. |
|
Win + PrtSc |
Automatically saves a full-screen screenshot to Pictures > Screenshots. |
|
Fn + Win + PrtSc |
A common alternative on Laptops |
The default feature of the PrtSc button in Windows 11 is to open the Snipping Tool rather than capture the screen. If you want to capture the screen using the traditional feature, you have to go to Settings > Accessibility > Keyboard, turn off “Use the Print Screen button to open screen snipping”.

Windows Built-in Screenshot Tools & Shortcuts
Besides the default PrintScreen shortcuts, Windows 10/11 has more powerful programs (Snipping tools and Xbox Game Bar) that can capture the screen with comprehensive features. You can use these programs to record video, capture specific regions, and even set a delay timer for your screenshots.
1. Snipping Tool
Snipping Tool is a native screenshot program to capture your computer. As mentioned in part 1, you can open it by pressing the PrtSc key (if you don’t turn off the settings), or you can press Win + Shift + S to activate it. You can choose from rectangular, freeform, window, or full-screen modes. The more advanced features include a Delay Timer to capture disappearing menus, a built-in Screen Recorder for Windows 11 users, etc.
Windows 11 saves the screenshot as PNG files in Pictures > Screenshots folder. But in Windows 10, it only copies the image to the clipboard by default, and you have to manually save the image from the pop-up notification.

2. Xbox Game Bar
Xbox Game Bar is mainly for game users to record gameplay with high-quality images and videos, without capturing the desktop background and taskbar. Press Win + G to activate Xbox Game Bar, or you can directly press Win + Alt + PrtSc to quickly screenshot. It it convienent that it will save the image to the Videos > Captures folder.

Surface Tablets Screenshot Shortcuts
Microsoft’s Surface is a high-end product of 2-in-1 tablets. People use it as a computer or a tablet. However, many people don’t use keyboards and prefer using it as purely a tablet, so the way of taking screenshots is a bit of differnt from that on a computer.
The quickest way is to press the hardware buttons, just like how you do it on your phone. On a Surface Pro 4 or any newer model, press the power button and the volume up button at the same time. The image will automatically be saved in Pictures > Screenshots. If you have a Surface Pen, it will be more convenient. double-click the eraser button on the top of the pen to activate the Snipping Tool on the Surface. You can circle a specific region, doodle some notes, and save it right away.
Third-Party Screenshot Tools & Shortcuts
From my personal perspective, as a tech writer, sometimes the built-in screenshot features are not enough to use. If you want more than just a simple screenshot, like quickly blurring out sensitive information (with mosaic), add some fun emojis, or capture an entire scrolling webpage, you need third-party screenshot tools. In this part, I will introduce three great screenshot software programs for you to choose from.
1. Leawo Free Screen Recorder
Leawo Free Screen Recorder is a free screen recorder, a 4-in-1 tool to capture high-quality images and videos for Windows 7/8/8.1/10/11. It supports three modes to capture your screen. Custom Mode for specific areas, Full Screen, and a smart Auto Detection Mode that automatically snaps to windows or UI blocks for advanced purposes like tech guide, etc. The captured image will automatically be saved as a JPG file, and you can change the saving folder in the software settings.

-
- Free online recorder to record window, browser tab or entire screen online.
- Free screen recorder to record screen in full-screen or custom area at up to 4K to MP4.
- Free webcam recorder to record webcam video.
- Free audio recorder to record audio from microphone or computer to MP3.
- Free screenshot snapper to snap screenshot to JPG.
The highlight is that it has a built-in drawing board that appears after you take a shot. You can add mosaics to hide the information, callouts, text, and all shapes like rectangles, ellipses, or arrows to highlight the details you want to emphasize. You can just click on the Screen Capture from the software’s main screen, or you can press the default shortcuts of the software, Ctrl + Alt + C (and you can change it), to fit your own workflow.

2. Lightshot
Once installed Lightshot, it replaces the standard “print screen” feature on your computer, giving you access to a much more powerful interface than the built-in tools. It is incredibly lightweight, and it is multi-platform supported. You can screenshot on Mac, Windows, and use it as a plug-in on Chrome, Firefox, IE, and Opera.
The most interesting feature is the ability to share the screenshot instantly online. Once you choose an area, a small toolbar opens. You can use the tools from the taskbar to doodle and highlight certain aspects of the image. Afterward, you can click Cloud button and instantly share the image. You can also search similar images on Google (Ctrl+G) in no time. By default, it is set to the PrtSc key, but you can also instantly capture the entire screen using Shift + PrtSc.

3. PicPick
For heavy users, like technical writers, UI/UX designers, or content creators, PicPick is the ultimate tool for taking screenshots. Obviously, it is not a free tool since it is for professional work. You need to pay at least $24 (limited time offer) for a year of the Single Plan and $96 (limited time offer) a year for the Team Plan. It has features beyond simple screenshots. The most popular one is the Scrolling Window feature, which allows you to take screenshots of the whole webpage or a long doc from top to bottom.
The other features of PicPick make it a great graphics editor, including a pixel ruler, color picker, and image editor similar to Photoshop. You can enhance your screenshots by adding mosaics, watermarks, and shadows, etc. You can also customize the hotkeys as well, for specific features. By default, Ctrl + PrtSc is for capturing a whole screen and Shift + PrtSc for a selected region.

Conclusion
I think this article is enough and covers all your needs to capture your screen, from the basic shortcuts to third-party tools. If you are a daily user without much need for advanced features, then the built-in shortcuts, snipping tool, and Xbox Game Bar are all good for your needs. If you are a user who requires more for your work, creativity, etc., try Leawo Free Screen Recorder, Lightshot, and PicPick. They have all kinds of features, free and premium. Just pick one that fits your needs.
-
How to Screenshot on Windows 10/11: Tools & ShortcutsSunny Wen/2026-03-30
-

Does Paramount Plus Have Live TV? Full GuideSunny Wen/2026-03-30
-

How to Download Videos from 9Now?Cassie J./2026-03-24
-

How to Disable YouTube Shorts: Simple Methods That WorkSunny Wen/2026-03-23
-

Hulu Screen Limits: How Many People Can Watch Hulu at Once?Cassie J./2026-03-24
-

From Flight to Hotel: How to Watch Netflix While TravelingCassie J./2026-03-24
-

How to Record on Canva: Step-by-Step Guide for BeginnersSunny Wen/2026-03-16
-

Paramount Plus Error Code 111: Causes, FixesLeia Liu/2026-03-13
-

4K Video Downloader Review: Is It Worth Using?Leia Liu/2026-03-13
-

ScreenPal Review: Is It the Right Screen Recorder for You?Sunny Wen/2026-03-12
-

How to Download OnlyFans Videos from Messages?Patrick Murray/2024-05-09
-

[2026] What is OnlyFans Media not Loading Issue & How to Fix?Patrick Murray/2024-02-21
-

How to Download OnlyFans Videos on Android/iPhone/PC?Patrick Murray/2024-06-28
-

How to Download Private YouTube Videos Without AccessPatrick Murray/2025-02-12
-

How to Download YouTube Members-Only Videos?Cassie J./2024-05-08
-

Latest List of the Best Free Movie Websites[2026]Patrick Murray/2024-05-07
-

[2026 Update] How to Download All Media from OnlyFans?Patrick Murray/2024-02-26
-

TK2DL: Features and Uses of this TikTok & Twitter DownloaderLeia Liu/2024-09-05
-

10 Best HDHub4u Alternative Sites for Movie DownloadPatrick Murray/2024-03-06
-

How to Turn Off Age Restriction on YouTube?Patrick Murray/2024-03-04
