

 Try for Free
 Try for Free
Share article:


Never Miss a Moment: How to Save Twitch Streams

2025-09-15 ・ Related to: CleverGet Recorder CleverGet Twitch Downloader
401 Views
Summary:
This article will show you some simple and effective ways to record and save Twitch streams. If you’re interested, follow along as we walk you through the process.
Twitch is full of exciting moments. Every stream brings intense gameplay or fun interactions that keep you hooked. But what happens when you want to keep that wonderful play or funny clip? Saving it can be confusing.

MenuCLOSE
Part 1: How to Record Twitch Streams Live with CleverGet Recorder
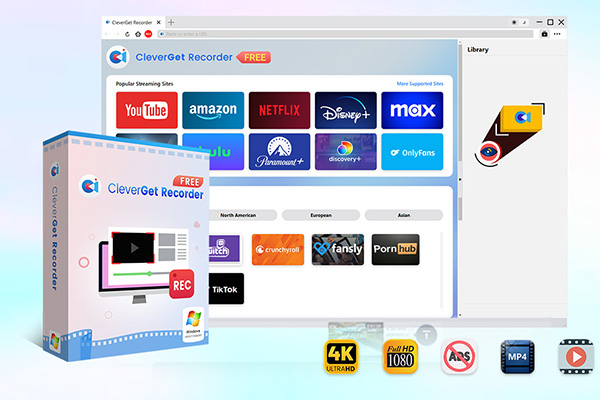
Hey there! So, you want an easy way to record Twitch streams? Well, let me tell you about CleverGet Recorder. It’s totally free and can snag both live streams and VOD content in stunning 4K – no annoying ads, and definitely no hassle involved. Plus, it’s pretty impressive because it can handle DRM-protected videos without breaking a sweat. What’s even better? The software automatically detects the audio and video tracks, so you only grab what you really want. With over 10 million folks using it, it’s become a favorite for quick and high-quality recordings. Ready to start? Here’s how to record Twitch videos with CleverGet Recorder.
-
Free streaming video recorder to record online on-demand video and live streaming video without quality loss and cost.
- 100% free to use.
- Record movies, TV shows, game streams, lectures, live concerts, etc.
- Record up to 4K video with 60FPS in MP4 or MKV.
- Schedule recording upon preset recording length.
- No watermark, no time limit, and ad-skipping (beta).
Step 1: Download and Install
Go to the CleverGet official website to download the installer. Complete the setup process on your computer – just make sure your system meets the basic requirements.
Tip: CleverGet Recorder works on both Windows and Mac. Just make sure you grab the right one for your computer!
Step 2: Set Up Recording Preferences
Click the three-dot menu → Settings → Record. Choose your video format, quality, fps, audio source, and where to save your files. Don’t forget to save the settings!

Step 3: Open the Twitch Stream
Launch the Twitch stream you want to record inside CleverGet. Pick a clear resolution and choose your audio track. A red REC button is near the address bar – click it to bring up the recording toolbar.

Step 4: Fine-Tune Before Recording
You’ll see options for recording speed, ad filter and scheduler. Speed changes preview smoothly, with flawless video output! Most ads can be skipped for an uninterrupted recording experience.

Step 5: Start Recording
Drag the timeline to your starting point and press REC. It’ll begin grabbing video and audio right away.

Step 6: Check Your Recordings
You can pause or stop anytime – each recording saves as a new file. Find all your videos in the Library (top-right icon). Play, move, or delete them with the click.

Part 2: How to Save Twitch Streams Live with CleverGet Twitch Downloader
So you’ve been using CleverGet Recorder to grab those live Twitch streams – nice! But what if you want to save full past broadcasts or download live videos for offline watching? Meet CleverGet Twitch Downloader. This handy tool lets you download any Twitch video in high quality – pick from 720p, 1080p, or full 4K, all with original audio and video. Watch wherever, even without the internet.

-
Professional video downloader to download on-demand videos and live streaming videos from 1000+ streaming services like YouTube, Facebook, Instagram, TikTok, etc.
- Batch download online video to MP4/MKV files.
- Download up to 8K video and 320kbps audio.
- Detect and remove ads during video download.
Here’s how to download your Twitch videos step by step:
Step 1: Get CleverGet
Head over to the official CleverGet website and grab the installer. It’s free and installs quickly. Once it’s on your computer, you’re all set – CleverGet Twitch Downloader is built right into the software.
Step 2: Pick a Save Location
Before starting the download, it’s important to set your preferred output folder. Click the three-dot icon in the top-right corner, then select “Settings”. Under the General tab, you can choose the location for saving your videos and audio files. Once done, click “Save” to confirm your settings.

Step 3: Paste the Video URL
Copy the full link of the Twitch video or clip you want. Paste it into CleverGet’s address bar – no need to find source links. The tool grabs everything automatically.

Step 4: Select Quality & Download
CleverGet will show available formats and resolutions. Choose your preferred quality (720p, 1080p, or 4K) and click “Download”. It’ll start saving right away.

Step 5: Check Download Progress
To see how it’s going, click the Downloading tab. You can pause with the Stop button or remove a task with the Close button.

Step 6: Enjoy Your Video
So, once your download wraps up, just head over to the Library to check out your saved videos. You’ll see a Play button there – just click that to start watching. And you can click the Play button to watch the video or use Open Folder to view the file location. From here, you can manage your files by deleting, renaming, or playing them with your preferred media player.

Part 3: How to Record Twitch Streams Live with VOD System
If you want Twitch to automatically save your streams, you’ve got to flip on the VOD feature in your settings yourself – it won’t just turn on automatically. Once you do, how long those past broadcasts stick around totally depends on your account: Partners and Prime folks get a generous 60 days, Affiliates get 14, and regular users only get 7 days before they’re gone for good. So if there’s a stream you really want to keep, better download it before it vanishes. Just a friendly tip!

Step 1: Turn On VOD Saving
Head over to your Twitch Creator Dashboard. Click your profile picture → Settings → Stream tab → find “VOD Settings” and toggle Store Past Broadcasts to ON.
Tip: Once enabled, Twitch will hang onto your streams for 14 days (or 60 if you’re an Affiliate or Partner).
Step 2: Go Live – It Saves Automatically
Once you’ve turned on VODs, you’re good to go. Every time you finish streaming, Twitch will save your broadcast with no extra effort from you.
Step 3: Watch, Edit, or Download
When you’re done streaming, find all your saved VODs in the Videos section of your Dashboard. From there, you can watch, clip, or grab your downloads.
Remember: VODs expire, so download anything you want to keep before time’s up!
Part 4: FAQ
Q1. Can I record a live stream without using extra software?
Yes! Twitch automatically saves your past broadcasts as VODs – if you turn on the setting. But if you want higher quality, no time limits, or more control, try a tool like CleverGet Recorder. It’s more flexible.
Q2. What are the technical and storage requirements for recording a live stream?
Storage requirements depend on resolution and bitrate – for example, recording 1080p at 60 FPS may use around 5–6 GB per hour. So first things first – you’re going to want a good internet connection and some decent storage space.
Q3. How to fix frame drops during recording?
Dropped frames usually mean your system is struggling. Try lowering the resolution or bitrate in your recorder’s settings. Also, a wired internet connection helps keep things steady.
Q4. Is it legal to record other streamers’ Twitch streams?
Recording someone else’s stream without permission can violate Twitch’s Terms of Service and copyright laws. Always ensure you have explicit permission from the streamer before recording their content.?
CleverGet Recorder

 Try for Free
 Try for Free
![]() Record on-demand videos for free;
Record on-demand videos for free;
![]() Record live streams for free;
Record live streams for free;
![]() Record DRM-protected streaming content;
Record DRM-protected streaming content;
![]() Support up to 4K resolution;
Support up to 4K resolution;
![]() Record videos as MP4/MKV files;
Record videos as MP4/MKV files;
![]() Allow scheduled recording;
Allow scheduled recording;
![]() Skip ads during recording.
Skip ads during recording.