Last updated on 2025-09-16, by
Essential Tips for New Streamers: How to Live Stream on YouTube
Summary:
This article will tell you how to stream on YouTube, especially different streaming methods. Whether you’re using a PC, mobile, or an encoder, we’ll give you the detailed introduction and what to do before, during and after the stream.
YouTube Live puts you and your audience in the same moment. Chat flies. You answer. The vibe feels closer than a regular upload. Host a quick Q&A, unbox a new mic, speedrun a game, or play a short set from your bedroom. Drop a poll to steer the show. Pin a comment. Viewers feel seen—and they stay.
Why go live? Real-time connection, instant feedback, and more chances to earn through ads, Super Chat, and memberships. Streams save to your channel like normal videos, so highlights live on. Captions help accessibility; analytics help you tune the next one. If you’re wondering how to stream on YouTube, that’s the path.
MenuCLOSE
Part 1: Tips You Need to Know
There are a few things you need to check off your list before you hit that “go live” button. Here’s the scoop:
1.Age and Account Requirements
First off, you’ve got to be at least 16 to stream on your own. If you’re in that 13 to 15 age bracket, you’ll need a parent or guardian to hang out with you during the stream. Oh, and some features might not be available for you yet. Don’t forget, you also have to verify your account with a phone number before you can go live for the first time.
2. Channel Standing
Your channel needs to be in good standing, meaning no live streaming restrictions in the past 90 days. If you’ve had any violations before, they could mess with your ability to stream. And keep in mind that once you enable live streaming, it might take up to 24 hours for everything to kick in. Patience, right?
3.Device and Platform Access
Mobile:If you want to stream from your phone, you’ll need at least 50 subscribers and a device that’s running Android 8.0 or later, or iOS 8 or later.
Computer: For desktop streaming, you can use Chrome version 60 or newer, or Firefox version 53 or newer. A webcam’s a must, or you can get fancy with a streaming encoder if that’s your style.
Important Tips:If your account has been restricted from live streaming, don’t even think about trying to get around it by using another account. Trust me, that’s a no-go and can really get you into trouble, possibly leading to account termination.
Part 2. Choose How You Want to Stream Live on YouTube
Planning to stream live on YouTube? Here are three straightforward ways to go live based on your equipment and goals. For a simple setup, just use your computer with a webcam and browser—super quick and easy. If you’re on the move, grab your phone and use the YouTube app—though you’ll need at least 50 subscribers. You also can try a streaming encoder. It’s great for gaming, multi-angle streams, or customizing your broadcast.
1.How to Start a YouTube Live Stream on PC?
Here’s how you can start a YouTube live stream from your PC:
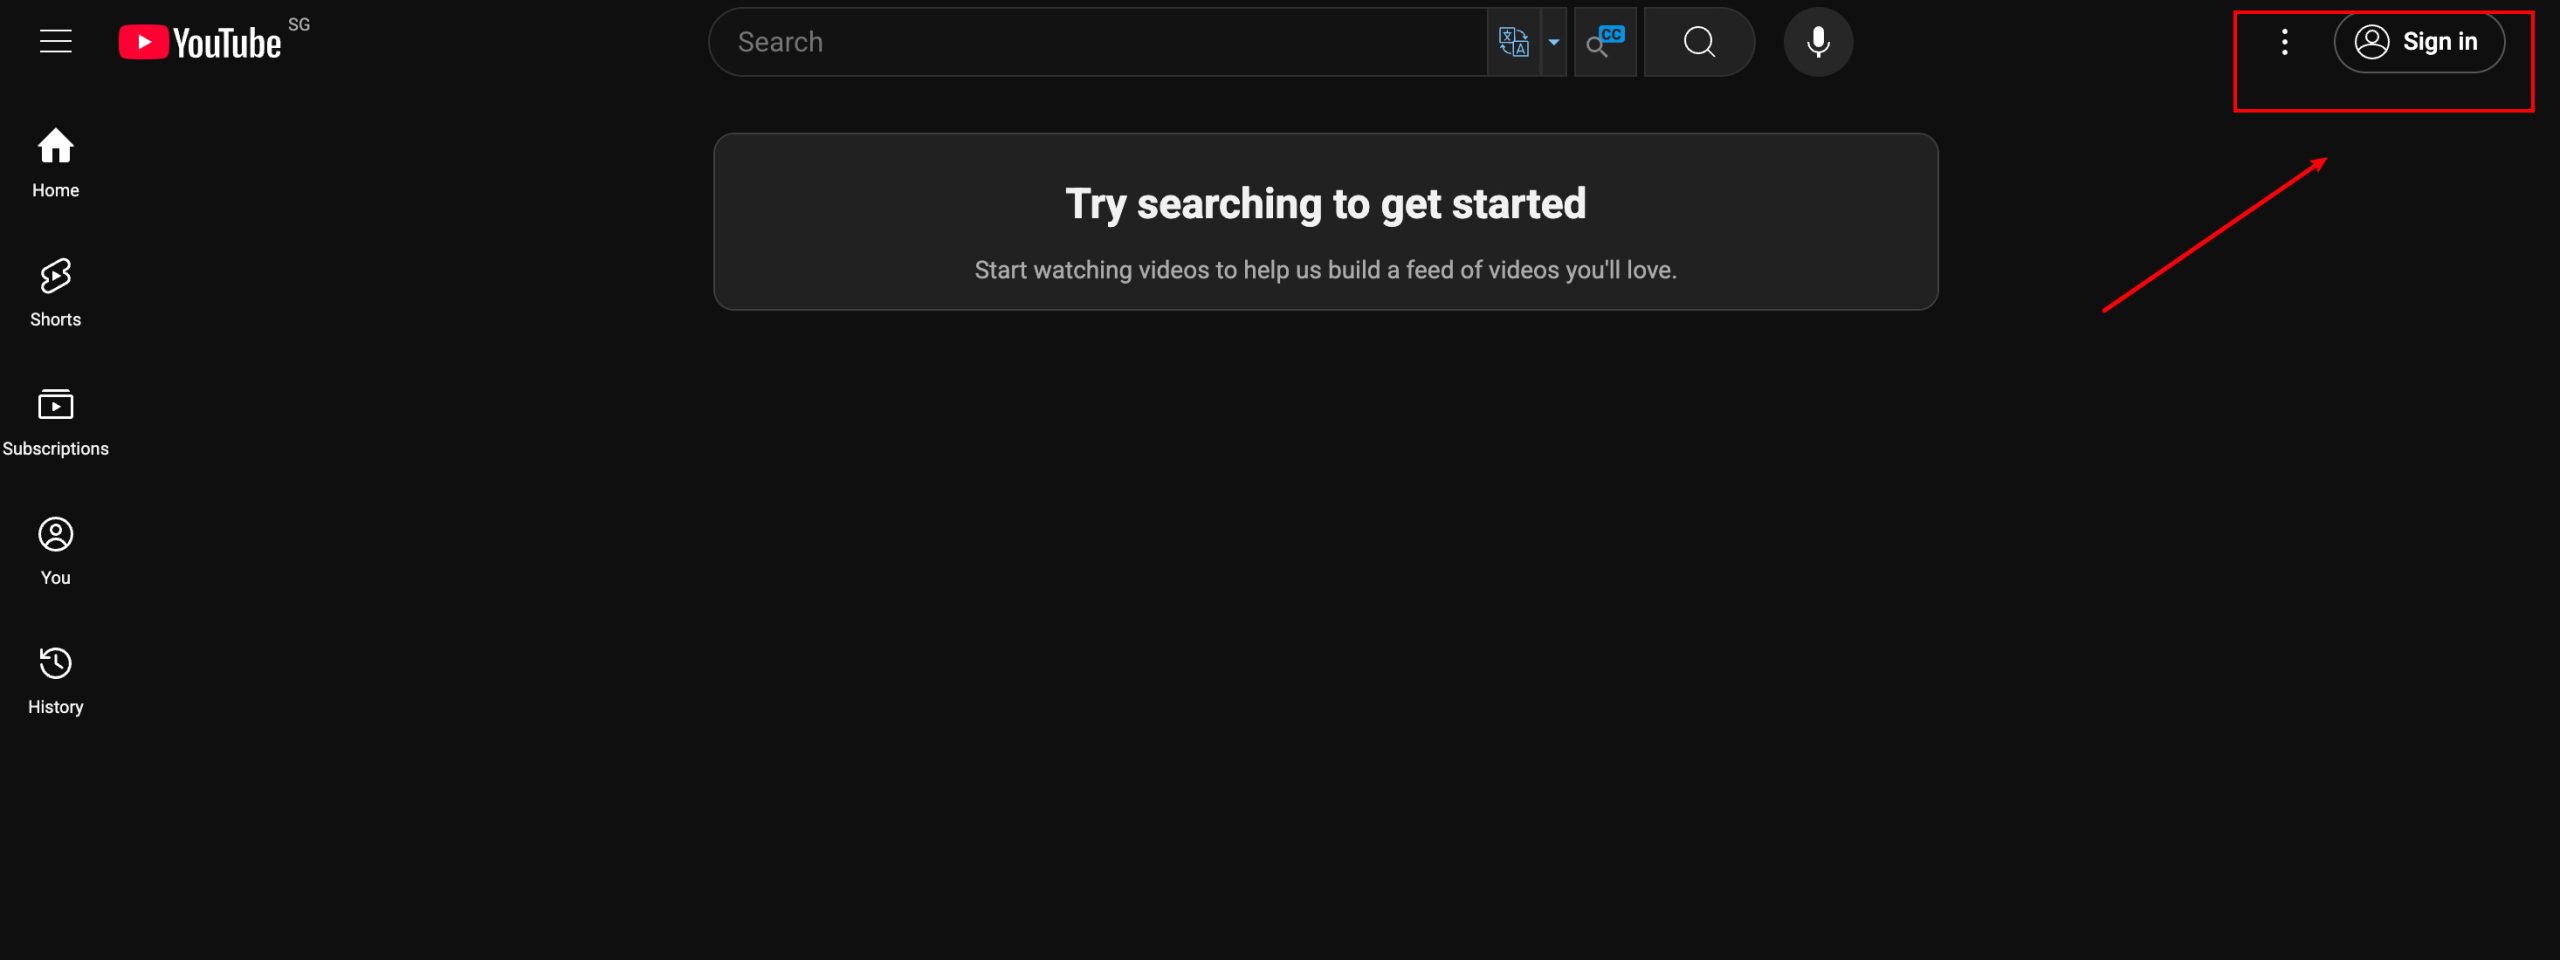
Step 1: Sign into YouTube
Go to YouTube and log into your account.
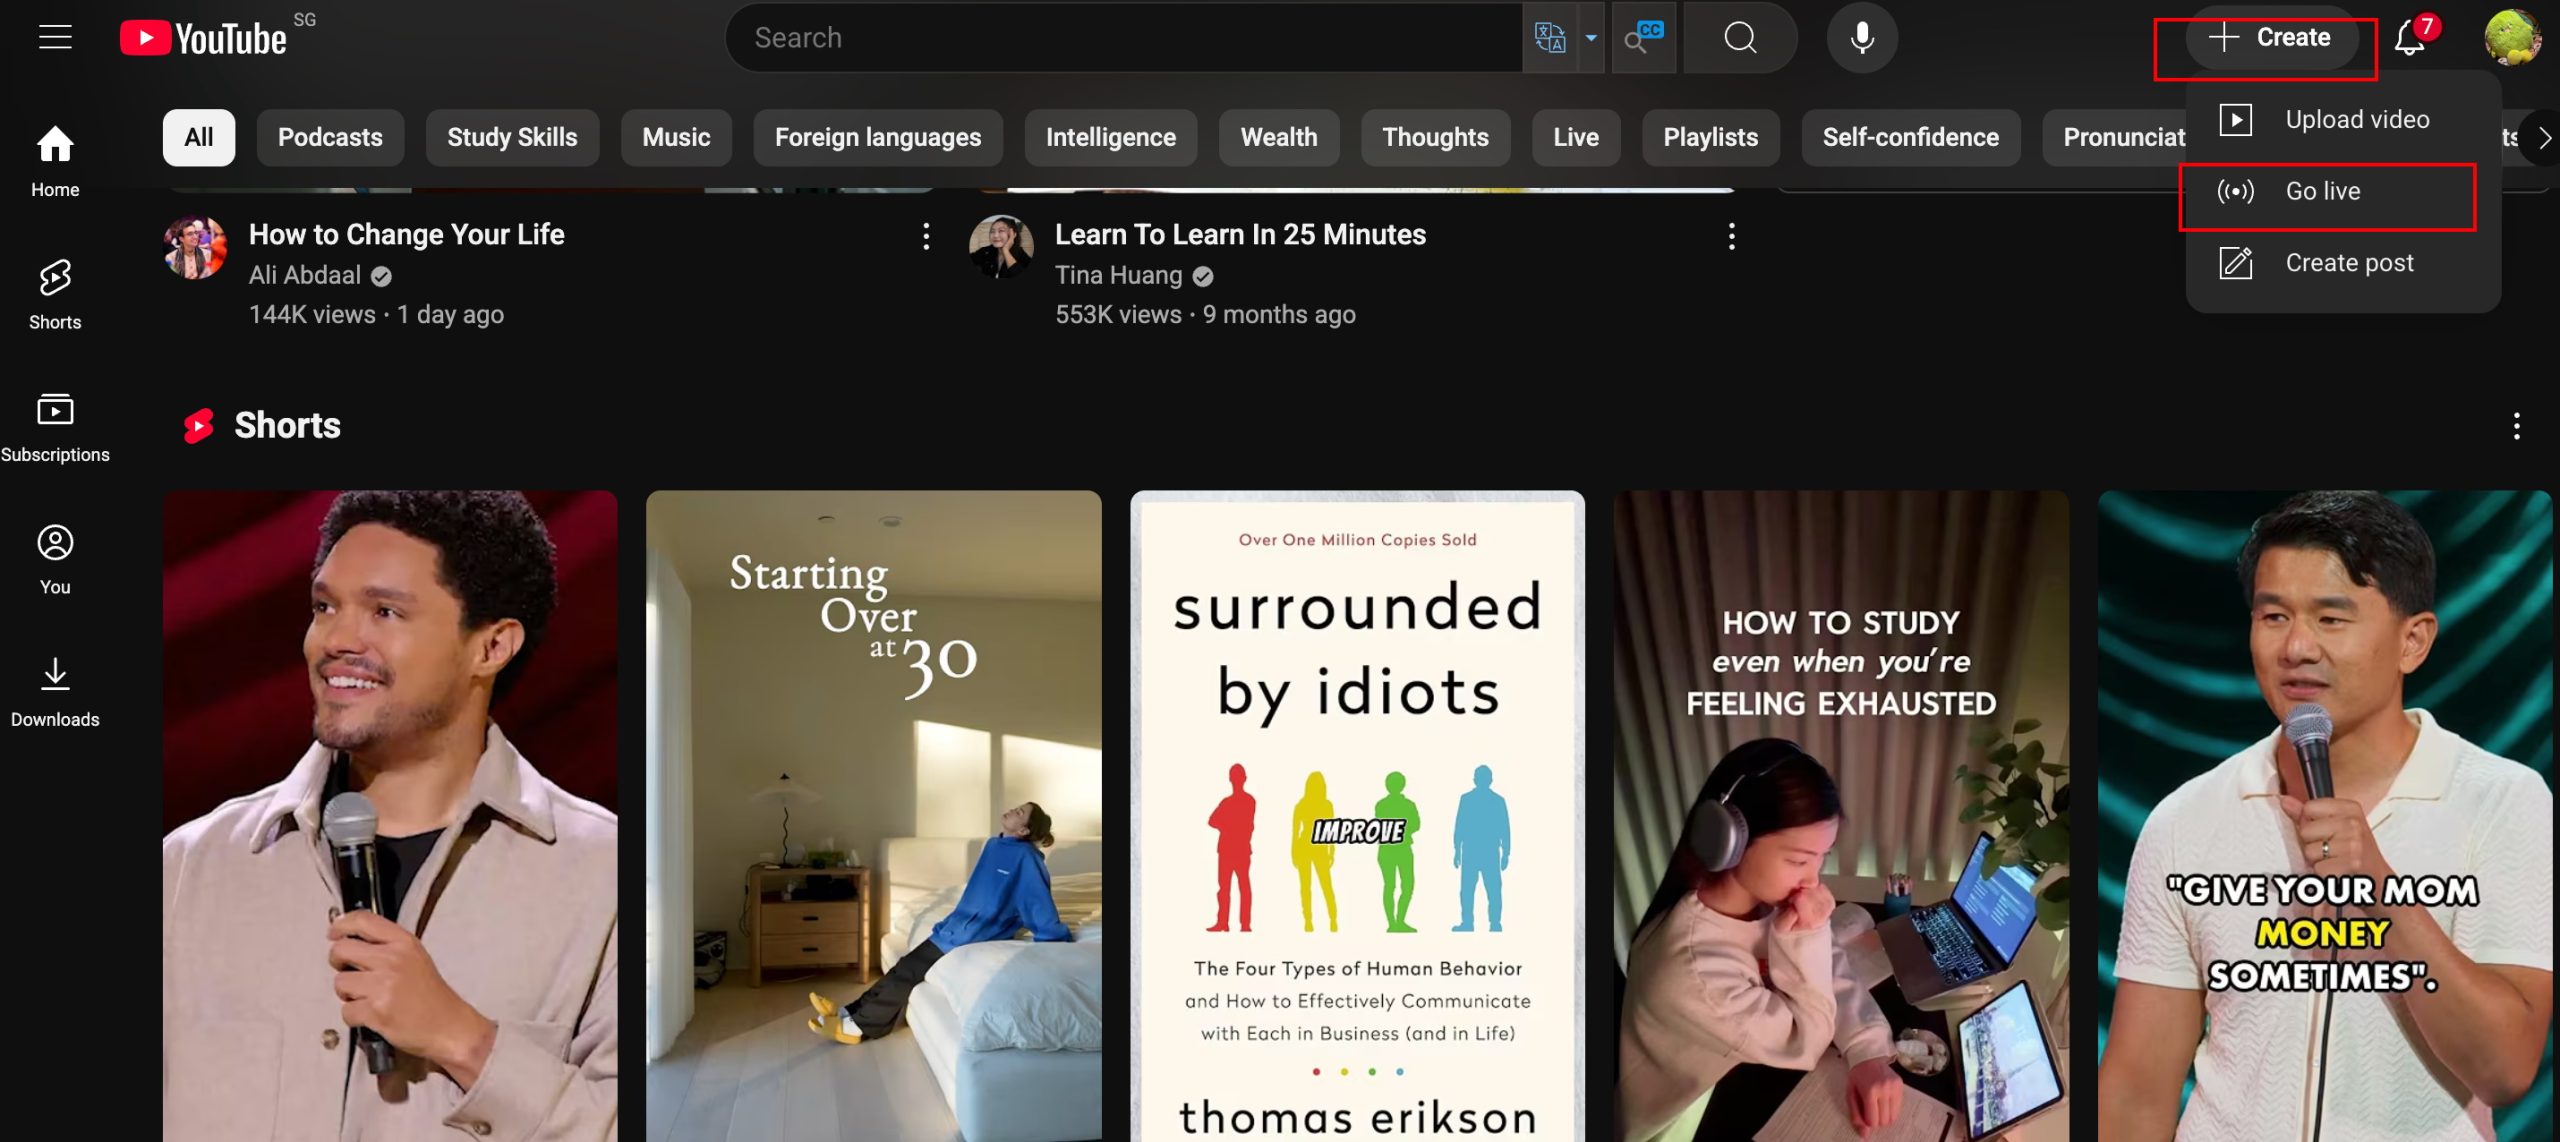
Step 2: Navigate to YouTube Studio
Click the “+ Create” icon in the top right corner and select “Go live”.
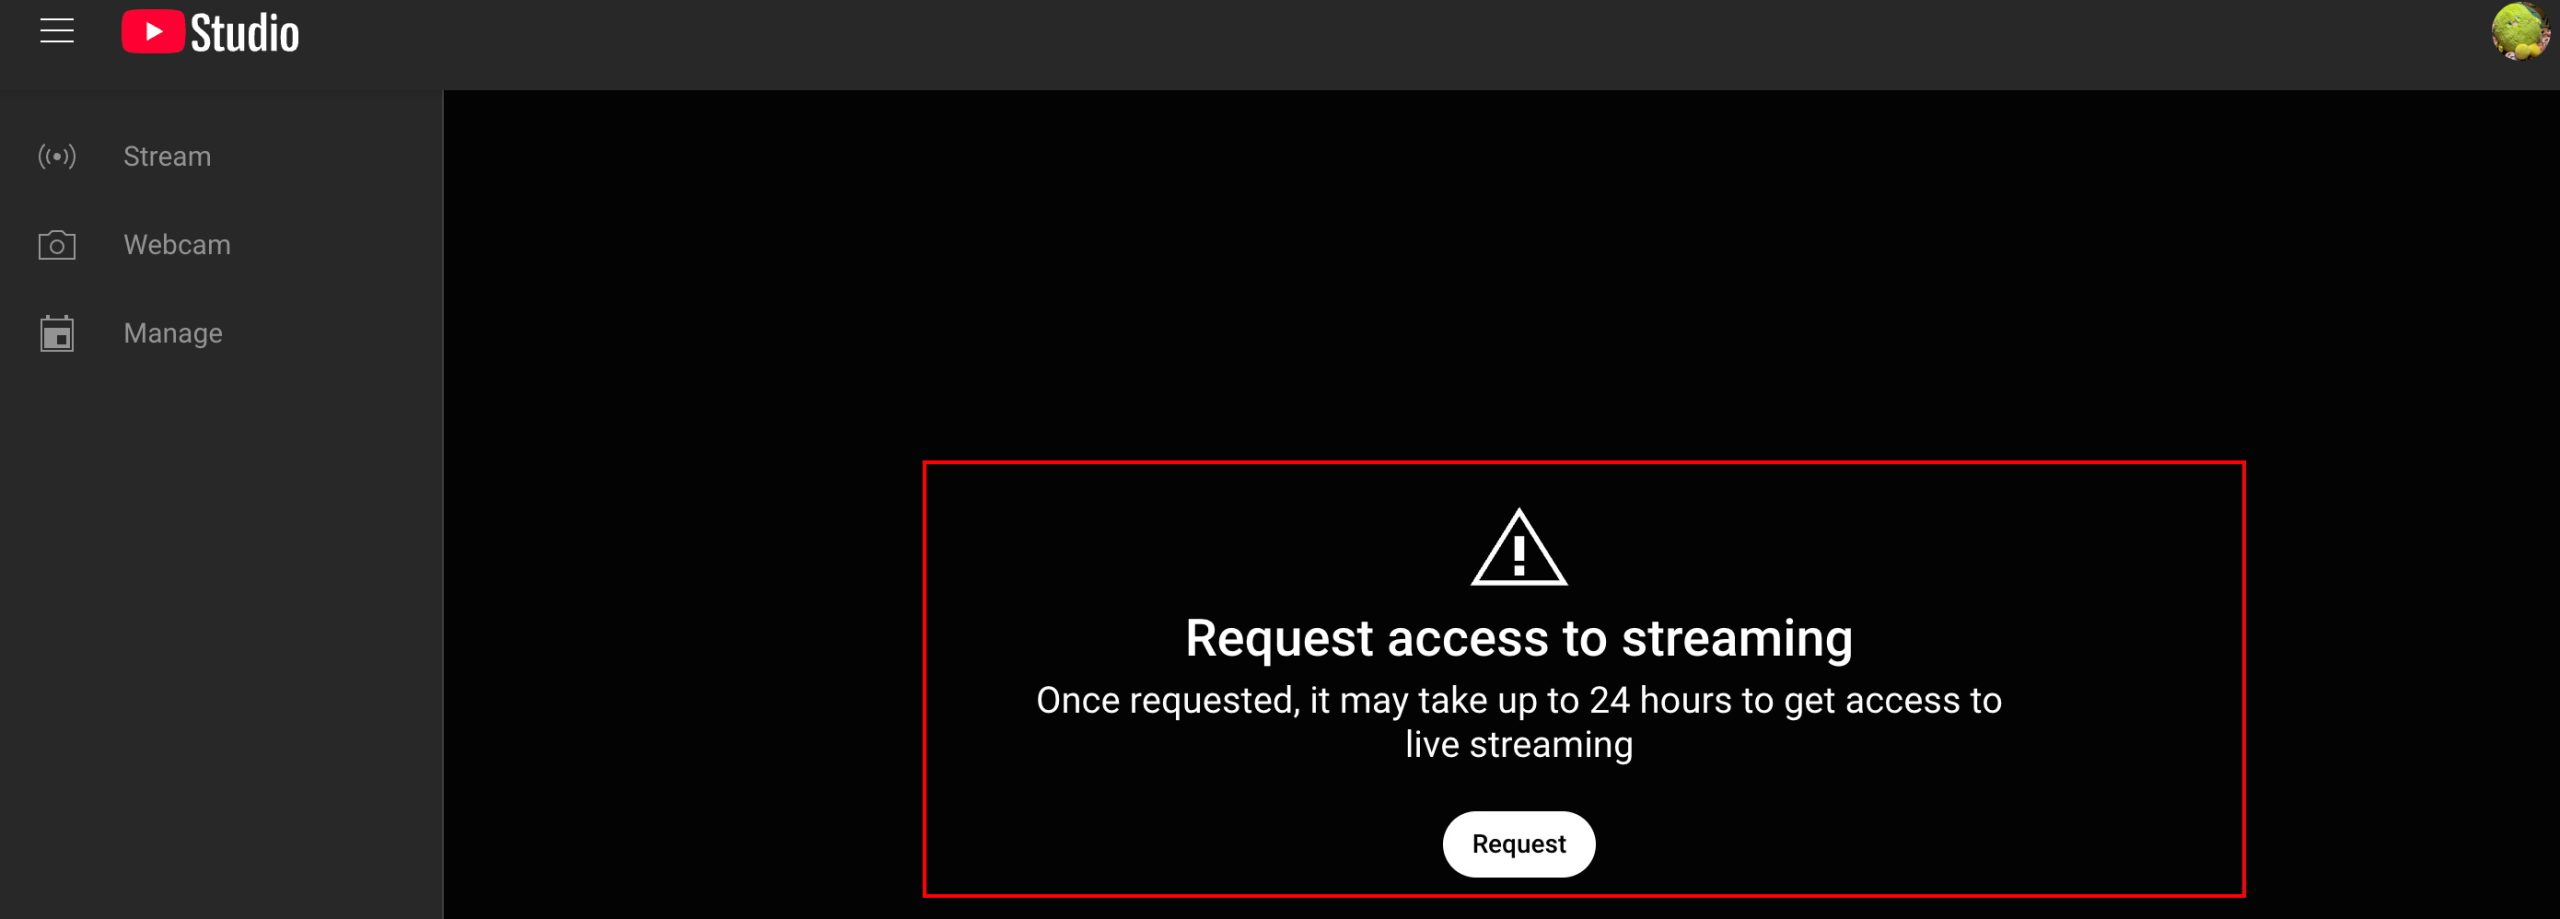
Step 3: Apply for Live Streaming
If this is your first time streaming, you need to apply for live streaming access. You’ll be prompted to verify your account with a phone number. This process may take up to 24 hours to complete, so plan ahead.
Step 3: Set Up Your Stream
Once your request gets the green light, you can head over to the “Webcam” option in the menu. There, you’ll fill in all the goodies like your stream’s title and description and pick a category—think gaming, education, that sort of thing. Don’t forget to upload a custom thumbnail! It can really help draw in more viewers. Also, let everyone know if your content is aimed at kids. Plus, you can dive into some advanced settings, like how you want the live chat to behave and your monetization choices.
Step 4: Go Live & End the Stream
When you’re all set, just hit that “Go Live” button to kick off your broadcast. It’s a great chance to chat with your viewers through live chat—keeps things lively. When you’re ready to wrap it up, just click “End Stream”. After that, your live stream will get processed and saved as a video on your channel.
2.How to Start a YouTube Live Stream on Mobile
Starting a live stream on YouTube from your mobile device is easy. Follow these steps:
Step 1: Prepare the Basic
You need to check you have at least 50 subscribers before streaming on mobile. Additionally, your mobile operating system must be Android 8.0+ or iOS 8+.
Step 2: Open the YouTube App
Launch the YouTube app on your mobile device and sign in to your account.
Step 3: Access the Live Stream Option
Find the plus (+) icon at the bottom center, and select “Live”. If it’s your first time, enable camera and microphone permissions, and keep in mind that it may take 24 hours for live streaming to be activated on your account.
Step 4: Set Up and Start Your Stream
Enter your stream title, set privacy (public, unlisted, or private), and add a description. You can also configure orientation, chat moderation, monetization, or schedule the stream. When ready, tap “Go Live”. It’s your time to interact with viewers. If you want to end up, you can tap “End Stream” and choose whether to save or delete the video.
3.How to Start a YouTube Live Stream with Encoder?
To stream with an encoder, you’ll need to use software to broadcast your content. Here’s how to get started:
Step 1: Set Up Your Encoder Software
The first thing is to download and install encoding software. Then, you should configure your video and audio sources, such as webcam, microphone, or screen capture.
Step 2: Get and Enter Your YouTube Stream Key
In YouTube Studio, click Create → Go Live → Stream, then copy your Stream Key. Paste this key into your encoder’s streaming settings.
Step 3: Start Your Stream
Click Start Streaming in your encoder software. Your live video will now broadcast directly to YouTube.
Step 4: End the Stream
When finished, stop streaming in your encoder, then return to YouTube Studio and click End Stream to conclude.
Part 3. Go Live: What to Do Before, During and After the Stream
1. Pre-Stream Checklist
Before you hit that “go live” button, you can learn these tips to boost your stream:
Check Your Gear:Devices are the key to supporting a nice stream. You’d better double- check your camera, microphone, and internet connection. Test out the audio levels and make sure the video is nice and clear. Seriously, no one wants to watch a pixelated or silent stream!
Plan Your Content: A good stream depends on good content. It’s helpful to have a rough idea of what you’ll talk about. Whether you’re diving into some gaming, doing a Q&A, or sharing a tutorial, a bit of structure can really keep things lively and engaging.
Promote Ahead: Don’t forget to shout out the time and topic of your stream on social media or wherever your community hangs out. More viewers? More energy! If you want to snag clips later, check out CleverGet Recorder. It’s a great tool for capturing high-quality videos—up to 4K, and no ads, which is a bonus!
2. During the Stream: Keep It Interactive
Once you’re live, it’s all about connecting with your audience:
Make sure to read and respond to comments as they come in. Give those shout-outs to new subscribers, answer questions, and maybe throw in a quick poll or two. The more you engage, the more your viewers will feel like they’re part of the action!
3. After the Stream: Make the Most of Your Content
Save Your Stream:Download your broadcast in crystal-clear 4K MP4/MKV using CleverGet. It’s great for editing and using your content in different ways.
Create Highlights:Go through and clip the best moments. Share those gems on TikTok, Instagram Reels, Twitter—wherever! It’s a fantastic way to keep growing your audience even after the stream has ended.
Review & Improve: Take some time to sift through the comments and check out your analytics. What did people love? What could use a little tweaking? Gather those insights and come back even better next time.
Part 4. FAQ
1. How can I watch YouTube live streams offline?
If you’re talking about your own stream, it’s super easy! Just download the replay straight from YouTube once the broadcast wraps up. But if it’s someone else’s live stream that you want to save, you might want to give CleverGet Recorder a shot. This handy tool lets you snag live videos from YouTube and a bunch of other sites. You can save them as MP4 or MKV files even in 4K without ads, so you can chill and watch whenever, even if you’re offline.
2. Can I go live without live streaming software?
Absolutely! YouTube’s got your back. You can kick off a basic stream right from your browser or your phone using your built-in camera—no extra software needed. It’s perfect for those quick, laid-back broadcasts. But, if you want to give viewers a nicer expedience, the encoder is your first choice.
3. How can I live stream without 1,000 subscribers?
No stress! You can still go live using a computer with a webcam. That 1,000-subscriber only is a requirement for the fancier features. Basic desktop streaming is open to everyone. But you need to know:do not do anything violating YouTube rules.
4. Can I bring guests into my live stream?
Sure! Eligible creators can invite guests to join their YouTube live streams for interactive sessions with multiple participants.
Part 5. Conclusion
You really know how to stream on YouTube now! Choosing a simple webcam, your mobile phone, or professional encoder software to go live is becoming easy. Before you follow the steps, do not forget to check that your account is verified and in good standing. If you want to save and reuse your streams later, try CleverGet Recorder. It lets you download high-quality videos in 4K without ads. Now you’re ready. Enjoy your stream.


 Try for Free
 Try for Free
